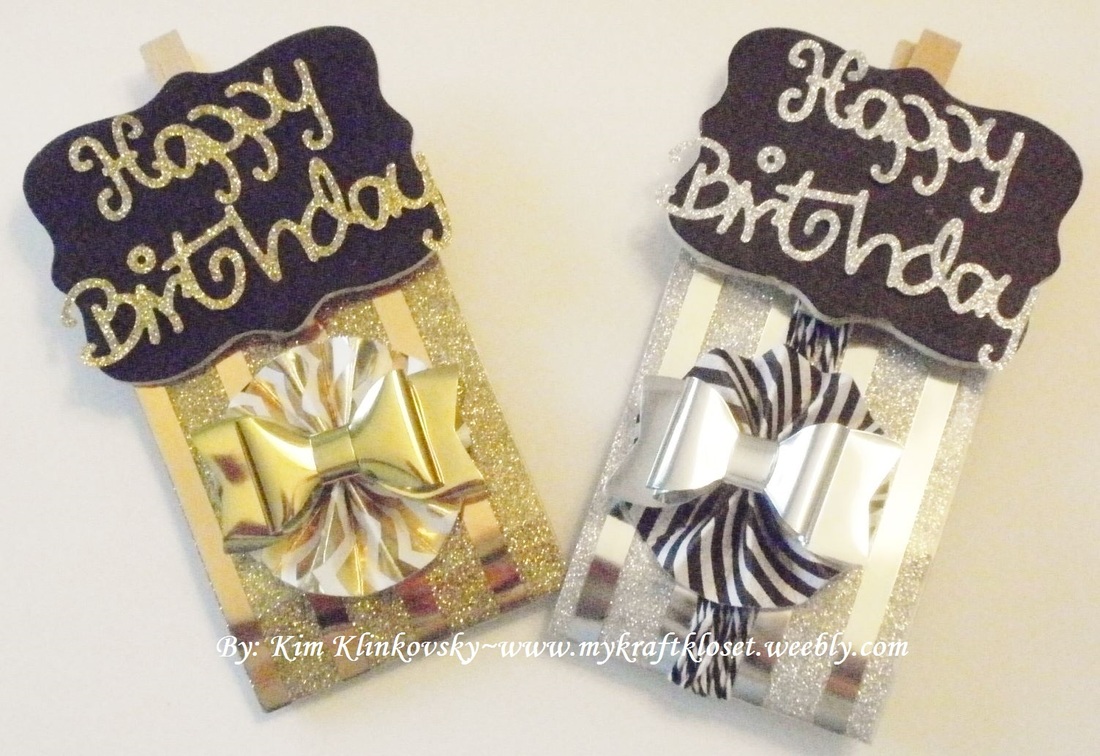
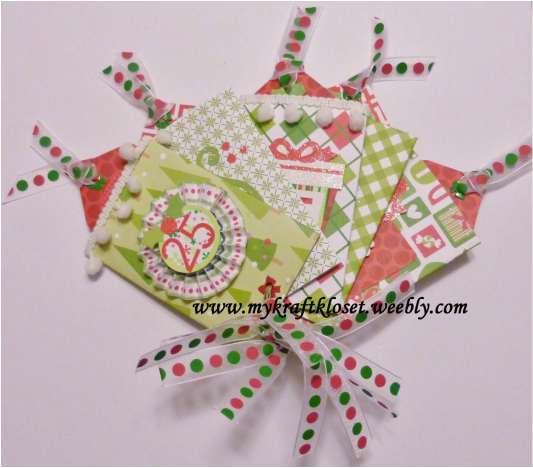
Hi everybody! I'm honored to share my first assignment posted earlier this week up on the CardMaker Blog. I was tasked with creating something with the theme "celebrate & decorate." So I channeled my twin boys who turn 13yrs old this month and chose to make these metallic gift card holders and coordinating party favors to surprise them. Click on the CardMaker Blog for a complete tutorial, materials list (including the Xyron sticker maker), and step by step how to use your holiday craft stash in a new and exciting way. It's a new year and a new design team. Check it out, follow our crafty adventures, and be sure to comment and let us know how you use your holiday craft stash in new ways. Thanks for stopping by! ~Kim Happy 13th Birthday Boys! We Love You! xoxoxo
0 Comments
The Craft & Hobby Association (CHA) 2016 Conference & Trade Show (CHA MEGA Show) is the largest craft trade marketplace in the world and just wrapped in Anaheim, California. All your favorite craft manufacturers from over 55 countries, conducting business, under one roof. They will teach over 3000 retail buyers and shop owners how to sell the new products, take orders, make connections to grow their business, have face time with customers, designers, and make new professional relationships. Unfortunately, we, the general public is not invited, but if you are a craft store owner, you should attend this Mega Craft show to learn, touch, and see all the brand new products, place orders, attend many classes and make and takes, network with the experts, and strengthen your skills for today’s economy. So, you can sell and teach your customers how to use the products. Click the pictures below to see more new products and collections arriving in your favorite craft stores very soon. Comment below and let me know what new products you are excited about? Or what new crafty technique do you want to learn this year? Follow me on Facebook and Twitter or join my "NetworkedBlogs" on the right sidebar of this blog and never miss a thing from your favorite designers or manufacturers! ~Kim Other Blogs I like: Skip to my Lou-Made by you Monday Happy Fall Y’all! I LOVE-LOVE-LOVE this time of year when all the leaves change colors and the elk and moose come out in abundance. I made this wonderful card for my design team Eat Cake Graphics. This incredible stamp is one whole piece and reminds me of my gorgeous Rocky Mountains with it's shimmery snow capped mountains, green pine trees, and the moose...
I am so excited and honored to be the guest designer this month for The Paper Girls Challenge #87 Sept 7 - Grateful / Thankful What are you grateful or thankful for? I am grateful for Fall, family, and fun together. It’s my most favorite time of the year when the leaves change colors, there’s a chill in the air, pumpkin flavors everywhere, and we have eight birthdays between September and November. It's crazy, but fun. So, I was inspired to make this card really shimmer with the golden color of the season and love that this stamp by Stampendous lists all the fun things we like to do in the Fall. I used Versamark clear ink to stamp the text background and sprinkled with Ranger super fine gold metallic embossing powder. Then added gold tinsel ribbon for some texture and more shimmer. And used a Krylon paint pen to change the clear adhesive gems to gold. Supplies: Stampendous autumn text stamp Versamark clear ink Ranger super fine gold metallic embossing powder Large Corner Rounder punch Scallop circle punch Tim Holtz rosette die cut Gold tinsel ribbon Clear adhesive gems Krylon gold paint pen Now show us your projects, anything that means "grateful or thankful" to you! Click the pic below for more details on how to enter by Sat, Sept. 19th. I entered this card in a challenge:
Happy Fall Y'All! - Little Red Wagon Challenge #308 4 Crafty Chicks Challenge #264 - Circles I made this for Archivers awhile back and it's just been waiting for me to show you and today is that day. I used precut cardstock, the beginners quilling set, and the Tim Holtz composer tissue wrap paper (which I just love) to create this unique circle card. Add some ribbon and make it a door hanger for some holiday decor or add a pocket for a gift card. Very versatile for an Anniversary, Birthday, Valentines, or just because.
See Archivers online for a complete supplies list and tutorial click "here" I entered this card in the "little red wagon" challenge and this weeks theme is "red and white." See my Gallery for more card ideas. Spring in the Rockies usually means Mother Nature isn't done snowing on us...which she isn't. We got a couple more inches of snow last week and a few flakes this week, but it didn't stay long, because the ground is warm and the sun came out. So, I thought this card was appropriate for a Colorado Spring, as my three sons are always up for a snowball fight.
This adorable card is a 6" x 6" square, so extra postage will be needed for mailing, but it's also my first shaker card. I knew when I saw this adorable snowball stamp from Unity Stamps I wanted to make it feminine. And the Eat Cake Graphics sentiment stamp went with it perfectly... Would you believe this handmade gift card holder album is made from toilet rolls? Well...it is! As you see, I made five holders attached with a D ring and tied on some coordinating ribbon. I can't take credit for this idea, so I want to thank my friend Cynthia for first introducing me to this project. I love it and use it all the time throughout the year. You can find lots of toilet roll projects on Pinterest and Bo Bunny just posted a toilet roll project today too. See how I made this gift card holder album below...
It's currently 4* degree's outside, maybe colder with a wind chill factor, and my craft room is in my basement...so I am NOT down there. But my desk downstairs would look pretty much like this too! LOL. No matter how many layers I put on, it's too cold to be down there. So, I've taken over my dining room table, while my kids are at school, and this is what it looks like when I make cards. I surround myself with my "stuff." Don't you? I love my 1x1" Tim Holtz mini distress inks, many punches make life easier, and all kinds of ribbon.
I've got a few more birthday cards to make, and maybe some Thanksgiving cards, before I can work on Christmas cards. So, I will post those cards soon. What are you working on? Do you make Thanksgiving cards or Christmas cards? Don't forget to check out my crafty pages for daily deals or ideas on craft products for your upcoming holiday cards/gifts: ![]() Happy Presidents Day! The sun is shining, no school today, my boys are outside playing, and I'm feeling crafting. Today I'd like to share with you a cup of tea...Jillibean Soup style. I cut the tea cup from a Slice design cartridge from the Jillibean Soup paper collection. Tip: I masked off the top, bottom, and the handle with blue painters tape. My favorite tape for masking or holding down thin die cuts! It won't stick to your paper or anything. Very easily removed. I colored in the top, bottom, and handle with a gold leaf paint pen; added red pearl gems; and foam dots to pop it up. Tip: I love to re-purpose my tools and use them in different ways. On this card I used scallop decorative scissors and a handle hole punch for the bottom paper strip, but you could easily use any scallop border punch from Fiskars or EK Success too! Then I cut out the month April from the Jillibean Soup paper collection. I chose April for Spring and to give as an upcoming Anniversary card or birthday card. I wanted to make it look like a tea bag with twine and a staple for a 3D effect. You don't always have to craft things flat. It's fun to give your projects some dimension and to mix and match your tools and see what you can create. What are you doing today? ![]() I create a perpetual calendar every year and just reprint the new months on colored cardstock with the new dates, birthdays, holidays, etc...for the new year. So, I can always use the same calendar base and title pages and just replace the cardstock with the new monthly dates. Tip: I created my calendar on MS Publisher, but you can use any word document. I save mine so I can use it year after year and just change the numbers, holidays, clip art, etc...to update it for the new year. ![]() I took an old calendar that had thick pages and a spiral binding, which was great for flipping to the next month. I use a bone folder to lift off the previous years pages. Or you could use un-do, that works great too. Tip: Un-do is the best product for getting off stickers or anything with an adhesive backing. It neutralizes the sticker for you to take it off and when it dries it's sticky again to reuse on something else. I love it for scrapbook pages when I change my mind. Or getting off stickers from my kids furniture. ![]() I use "green" repostionable adhesive to easily take off last years pages and adhere this years pages. As you can see, I like to use different colors with each month and match the holiday or season. I added clear calendar stickers for my months, clip art, and die cuts to each page. I adhered some of them with my Xyron sticker maker. My calendar goes from January to January so it gives me a month to create my next calendar. I promised I'd show you the NFL Denver Broncos Birthday card for a super bowl birthday party this weekend. It turned out really good. I surprised myself and had the right orange and blue Bazzill cardstock. LOL. Here are some of the tools I used: Xyron sticker maker for the navy Pebbles ribbon, spellbinders label frames, stampin up ink, Ranger distress ink, eyelets and the crop-a-dile (LOVE this tool), versamark ink, and chestnut brown zing embossing powder for the "happy birthdays" on the front. Go Broncos!
|
Hi! Welcome to
My Kraft Kloset I'm Kim Klinkovsky, a Published Card Maker, Blogger, Scrapbooker, Jewelry Maker, Wife to an US Army Veteran, Mom to 4 kids (including twins) and this is my crafty place. It's interrupted by life, fueled by coffee & sweet tea, where I share all my crafty adventures. Follow my social media channels above to see more! ©2013-©2023 *** ***
I, Kim Klinkovsky am the legal copyright holder ©2013 - ©2023 of all the material (pictures, text, & artwork) on this website and blog. It may not be used, reprinted, copied, submitted, sold, or published without my written consent. *** I'm on a couple Design Teams and in a few affiliate programs that have given me products to try or use, but my opinions are my own and I use what I like. Affiliate links are listed below and listed in the supply lists of my projects. They allow me to receive a small commission if you click on those links or purchase any products, at no extra cost to you. It helps me contribute to my family & keeps this blog going. Thank you for your support! Affiliate Links:
Design Teams: Publications: Awards: Categories
All
Archives
August 2023
Past
Design Teams: FTC Declaration:
**As a designer I occasionally receive product(s) to use in some of my posts. Some posts may contain Affiliate links at no cost to you.** Stamps and other products shown on this website/blog may have been donated for promotional purposes by the company(ies) named in the post. All opinions are my own and Affiliate links and programs help to support my family and keep this site going. Disclosure Statement for Affiliate Links Policy is valid from: 31 December 2013 To get your own policy, go to: www.disclosurepolicy.org |