I entered this card in:
The Paper Girls Challenge #83 - Babies!
|
After four boys a friend of mine FINALLY had a baby girl!!! Yes, baby #5! Congratulations! As a mom of one daughter and three sons, I get it. And I rarely get to make girl cards. So, when I do, they tend to be frilly and pink, but this one I wanted a sweet vintage look. I got out my Slice machine, yep, I still have one and still love it. It's light and portable and can do tons of quick cuts, titles, numbers, etc... I used the baby slice design cards for the onsies and the number die cuts; pink baby DCWV pattern paper; a soft eyelet border punch; inked the edges in a soft chestnut ink; adhered to a kraft colored base card; and finished with a soft ribbon and button.
I entered this card in: The Paper Girls Challenge #83 - Babies!
1 Comment
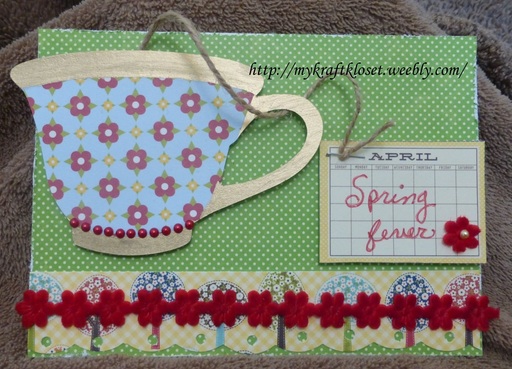
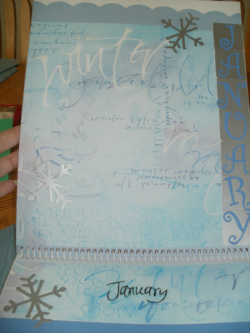
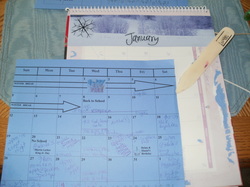
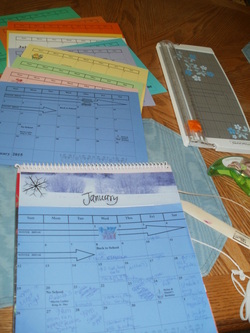
 Happy Presidents Day! The sun is shining, no school today, my boys are outside playing, and I'm feeling crafting. Today I'd like to share with you a cup of tea...Jillibean Soup style. I cut the tea cup from a Slice design cartridge from the Jillibean Soup paper collection. Tip: I masked off the top, bottom, and the handle with blue painters tape. My favorite tape for masking or holding down thin die cuts! It won't stick to your paper or anything. Very easily removed. I colored in the top, bottom, and handle with a gold leaf paint pen; added red pearl gems; and foam dots to pop it up. Tip: I love to re-purpose my tools and use them in different ways. On this card I used scallop decorative scissors and a handle hole punch for the bottom paper strip, but you could easily use any scallop border punch from Fiskars or EK Success too! Then I cut out the month April from the Jillibean Soup paper collection. I chose April for Spring and to give as an upcoming Anniversary card or birthday card. I wanted to make it look like a tea bag with twine and a staple for a 3D effect. You don't always have to craft things flat. It's fun to give your projects some dimension and to mix and match your tools and see what you can create. What are you doing today?  I create a perpetual calendar every year and just reprint the new months on colored cardstock with the new dates, birthdays, holidays, etc...for the new year. So, I can always use the same calendar base and title pages and just replace the cardstock with the new monthly dates. Tip: I created my calendar on MS Publisher, but you can use any word document. I save mine so I can use it year after year and just change the numbers, holidays, clip art, etc...to update it for the new year.  I took an old calendar that had thick pages and a spiral binding, which was great for flipping to the next month. I use a bone folder to lift off the previous years pages. Or you could use un-do, that works great too. Tip: Un-do is the best product for getting off stickers or anything with an adhesive backing. It neutralizes the sticker for you to take it off and when it dries it's sticky again to reuse on something else. I love it for scrapbook pages when I change my mind. Or getting off stickers from my kids furniture.  I use "green" repostionable adhesive to easily take off last years pages and adhere this years pages. As you can see, I like to use different colors with each month and match the holiday or season. I added clear calendar stickers for my months, clip art, and die cuts to each page. I adhered some of them with my Xyron sticker maker. My calendar goes from January to January so it gives me a month to create my next calendar. |
Hi! Welcome to
My Kraft Kloset I'm Kim Klinkovsky, a Published Card Maker, Blogger, Scrapbooker, Jewelry Maker, Wife to an US Army Veteran, Mom to 4 kids (including twins) and this is my crafty place. It's interrupted by life, fueled by coffee & sweet tea or a cocktail--Ha! And where I share all my crafty adventures. *** Follow Social Media Channels above to see more! ©2013-©2024 *** ***
I, Kim Klinkovsky am the legal copyright holder ©2013 - ©2023 of all the material (pictures, text, & artwork) on this website and blog. It may not be used, reprinted, copied, submitted, sold, or published without my written consent. *** I'm on a couple Design Teams and in a few affiliate programs that have given me products to try or use, but my opinions are my own and I use what I like. Affiliate links are listed below and listed in the supply lists of my projects. They allow me to receive a small commission if you click on those links or purchase any products, at no extra cost to you. It helps me contribute to my family & keeps this blog going. Thank you for your support! Affiliate Links:
Design Teams: Publications Awards: Categories
All
Archives
April 2024
Past
Design Teams: FTC Declaration:
**As a designer I occasionally receive product(s) to use in some of my posts. Some posts may contain Affiliate links at no cost to you.** Stamps and other products shown on this website/blog may have been donated for promotional purposes by the company(ies) named in the post. All opinions are my own and Affiliate links and programs help to support my family and keep this site going. Disclosure Statement for Affiliate Links Policy is valid from: 31 December 2013 To get your own policy, go to: www.disclosurepolicy.org |