Challenges:
Little Tangles Challenge #68- Anything Goes
Skip to my Lou-Made by you Mondays
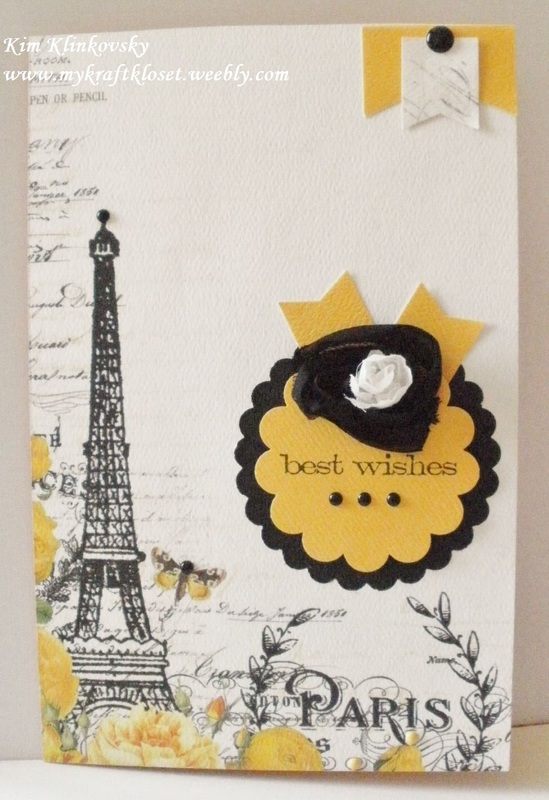
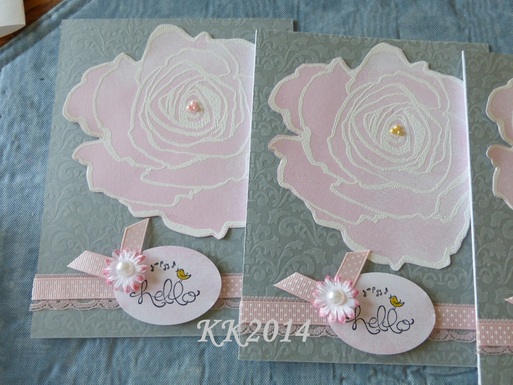
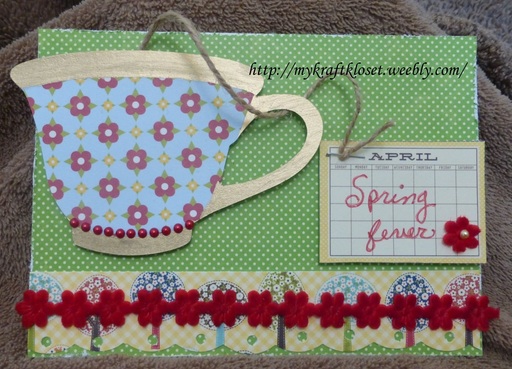
Hi everybody! I'm up on the CardMaker Blog sharing another fast and easy idea for making beautiful cards in 10 minutes that look like you spent all day. I created this gorgeous card for my parents to celebrate their 48th Wedding Anniversary! I absolutely LOVE pattern paper and this Authentique paper collection is just stunning. So, get ready to cut up those pretty papers you’ve been hoarding...I mean saving (ha!) and let’s get started. Get a step by step tutorial and all the materials I used up on the CardMaker Blog. Happy Anniversary Mom & Dad! Love~Kim and family
Challenges: Little Tangles Challenge #68- Anything Goes Skip to my Lou-Made by you Mondays
1 Comment
Happy Wednesday...Who wants cake? Join us for an exciting Blog Hop and a Giveaway too! Hop along with me and the talented designers from the Cardmaker Blog Team and The Greeting Farm as we each share our one of kind unique projects using these fun and whimsical stamps. Check them out. They really have a great variety to choose from.
See tutorial below... Happy Thursday everybody! Hop along with me and the talented designers from the Cardmaker Blog Team and Ranger Industries. As we each share lots of wonderfully creative projects using the *NEW* Tim Holtz Distress Crayons. I can't wait to see what everybody created...
Happy Spring! I hope it's warming up where you are. We had 4" of snow just two days ago and today it's mostly melted, warm, and sunny. But it will snow again...that's just what it does in Colorado. It's also the day after my daughter's birthday, so I can share with you the card I made her. I wanted it bright and happy for Spring and this Amy Tangerine collection really delivered. I love this modern look with a retro a twist with the mod shapes and cassette tapes. First adhere the pink and yellow pattern papers to a card base. Punch out nine label shapes from four sheets of pattern paper, run through a sticker maker, and adhere to card. I layered two ribbons on top of this cool pink burlap ribbon. Add flower embellishments, enamel dots, music note stickers, and the "sweet life" sticker in the middle. And another card with NO stamping. ~Kim Challenges:
-Little Red Wagon Challenge #334- Happy Easter/Spring -The Paper Girls Challenge #100!!-pretty paper-friendships -WIW Photo Inspiration Challenge ~ M1616: I was inspired by the colors and the spots. -Skip to my Lou-Made by you Mondays Supplies used: American Crafts-Amy Tangerine: Better Together paper collection, stickers, and ribbon; SU label punch; Recollections Kraft card/envelope set from Michaels; My Minds Eye enamel dots; paper flowers; Creative Impressions leaves and brads; Xyron 1.5" sticker maker; Glue Dots; and Scor-Tape. April showers bring May flowers and these magical flowers by Eat Cake Graphics stamps are buzzing with activity. I don't know about you...but we've had 30 straight days of rain and the flowers and trees are budding and blooming everywhere. If you're area has been hard hit by traumatic Spring weather I hope your safe and you're in our thoughts. Here is a close up so you can see the unique mottled watercolor background, the fuzzy or mossy effect of the flower soft, and the sparkle everywhere...
Sophie Willoughby has a card for her Mom for Mother’s Day. When I saw this adorable stamp from Eat Cake Graphics Stamps it had a letter addressed to Santa. Which would be cute for Christmas or a Birthday card too! But I wanted to mask it and make it a card for Mother’s Day...
Abagail is an adorable stamp from Eat Cake Graphics. When I saw her I knew I wanted to use her for a Mother’s Day card. What little kid doesn’t remember baking or cooking something for their moms? And this cute stamp can be used for many occasions...
I bought this VERY big rose cling stamp (by Stampendous: Cling Jumbo Rose Set #CRS5006) a really long time ago and used it on my Mother's Day cards. Little did I realize I did not have an acrylic block BIG enough to put it on. Panic! No...LOL...well a little. Then I searched around my craft room until I came up with a solution, because I was determined, I was going to use that stamp! My ah ha moment! I could use one of my thick Sizzix dies in the plastic case. Would the stamp cling to it? Yes it did! Pretty good too. I inked my white cardstock with Ranger Tim Holtz Spun Sugar distress ink and dragged the whole ink pad over it. Kind of random in all directions. I inked up the rose stamp with Versamark clear watermark ink (the best pigment ink) and started stamping on the cardstock. I sprinkled Inkadinkadoo White Linen embossing powder over the stamped roses and heat embossed. I stamped and embossed one rose at time and cut them out. I used pre-embossed gray cardstock by American Crafts, but you could make your own with embossing folders, and then I sanded it with a Making Memories sanding block to bring out the pattern. I used two different ribbons by layering a pink polka dot on top of a pink lace for a unique look. Stamp a sentiment, I used "hello" from Stampin Up. Using the pink cardstock scraps leftover from the rose stamp, and punched it out with an oval punch. Inked the edges of a fabric flower and added a pearl. Add some pearl gems to the center of the rose. I found this stamp very versatile and would use it not only for Mother's Day, but for birthdays, and anniversary cards too. Finished this is an A7 card. Happy Presidents Day! The sun is shining, no school today, my boys are outside playing, and I'm feeling crafting. Today I'd like to share with you a cup of tea...Jillibean Soup style. I cut the tea cup from a Slice design cartridge from the Jillibean Soup paper collection. Tip: I masked off the top, bottom, and the handle with blue painters tape. My favorite tape for masking or holding down thin die cuts! It won't stick to your paper or anything. Very easily removed. I colored in the top, bottom, and handle with a gold leaf paint pen; added red pearl gems; and foam dots to pop it up. Tip: I love to re-purpose my tools and use them in different ways. On this card I used scallop decorative scissors and a handle hole punch for the bottom paper strip, but you could easily use any scallop border punch from Fiskars or EK Success too! Then I cut out the month April from the Jillibean Soup paper collection. I chose April for Spring and to give as an upcoming Anniversary card or birthday card. I wanted to make it look like a tea bag with twine and a staple for a 3D effect. You don't always have to craft things flat. It's fun to give your projects some dimension and to mix and match your tools and see what you can create. What are you doing today? |
Hi! Welcome to
My Kraft Kloset I'm Kim Klinkovsky, a Published Card Maker, Blogger, Scrapbooker, Jewelry Maker, Wife to an US Army Veteran, Mom to 4 kids (including twins) and this is my crafty place. It's interrupted by life, fueled by coffee & sweet tea or a cocktail--Ha! And where I share all my crafty adventures. *** Follow Social Media Channels above to see more! ©2013-©2024 *** ***
I, Kim Klinkovsky am the legal copyright holder ©2013 - ©2023 of all the material (pictures, text, & artwork) on this website and blog. It may not be used, reprinted, copied, submitted, sold, or published without my written consent. *** I'm on a couple Design Teams and in a few affiliate programs that have given me products to try or use, but my opinions are my own and I use what I like. Affiliate links are listed below and listed in the supply lists of my projects. They allow me to receive a small commission if you click on those links or purchase any products, at no extra cost to you. It helps me contribute to my family & keeps this blog going. Thank you for your support! Affiliate Links:
Design Teams: Publications Awards: Categories
All
Archives
April 2024
Past
Design Teams: FTC Declaration:
**As a designer I occasionally receive product(s) to use in some of my posts. Some posts may contain Affiliate links at no cost to you.** Stamps and other products shown on this website/blog may have been donated for promotional purposes by the company(ies) named in the post. All opinions are my own and Affiliate links and programs help to support my family and keep this site going. Disclosure Statement for Affiliate Links Policy is valid from: 31 December 2013 To get your own policy, go to: www.disclosurepolicy.org |