To enter use the Rafflecopter box below.The more boxes you check the better your chances and a winner will be selected randomly and announced next week. Good luck and Happy Holidays! ~Kim and family
Happy Holidays everybody! My personal "thank you" for your kind words and support this year and every year as I continue our monthly Christmas GIVEAWAYS!!! If you don't know about it, we are having a crafty giveaway every week in December. Yep, that is one prize EACH week! Now go enter prize #3 below and tell all your crafty friends and family to follow our crafty adventures and get in on the fun too!
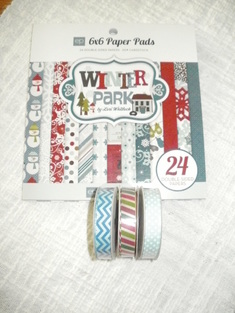
Week #3 Prize: is a New 5-pack of Embellishments from Doodlebug and American Crafts. I LOVE these, don't you? They are super cute and fun on cards, layouts, or any craft project. And I'll toss in some surprise goodies for you too!
To enter use the Rafflecopter box below.The more boxes you check the better your chances and a winner will be selected randomly and announced next week. Good luck and Happy Holidays! ~Kim and family
36 Comments
Thank you for all your kind words and support of my crafty adventures!
I love reading your comments and hearing about your projects. Thanks for sharing with me. I really do find it rewarding to give than receive. So, without further adieu our next Crafty Holiday winner is...
Happy Holidays everybody! As my personal "thank you" for your kind words and support this year and every year, I've decided to continue our monthly Christmas GIVEAWAYS!!! If you don't know about it, we are having a crafty giveaway every week in December. Yep, that is one prize EACH week! Now go enter prize #2 below and tell all your crafty friends and family to follow our crafty adventures and get in on the fun too!
Week #2 Prize: is a New 5-pack of Tim Holtz Distress Markers. I LOVE these, don't you? And I'll toss in some surprise goodies for you too! To enter use the Rafflecopter box below. The more boxes you check the better your chances and a winner will be selected randomly and announced next week. Good luck and Happy Holidays! ~Kim and family
Happy Holidays everybody! As my personal "thank you" for your kind words and support this year and every year, I've decided to continue our monthly Christmas GIVEAWAYS!!! If you don't know about it, we are having a crafty giveaway every week in December. Yep, that is one prize EACH week! Now go enter below and tell all your crafty friends and family to follow our crafty adventures and get in on the fun too!
Week #1 Prize: is a 4-pack of Tim Holtz mini Distress Inks with the newer colors. I LOVE these, don't you? And I'll toss in some surprise goodies for you too! To enter use the Rafflecopter box below. The more boxes you check the better your chances and a winner will be selected randomly and announced next week. Good luck and Happy Holidays! ~Kim and family Happy December everybody! Only 24 days until Christmas. Can you believe it? Where did the year go? Yikes! So much to do...gotta get busy. And one of my holiday traditions is to make lots of special holiday tags to have ready for present wrapping in the coming weeks. And this year I used Epiphany Crafts Tools to make them super special, one of a kind, fast and easy, even the kids can help too! And NO stamping, but you could. Maybe a little to/from stamped on the back or on frosty's lower half.
Read more... It's winter time and once again our whole town is blanketed in fresh new snow. And my three sons are hoping for a snow day, so we can sleep in and then go sledding! I won't lie, I am too! lol. Anyhoo...before I go sledding, let me share my newest project. I've been wanting to create a home decor piece for a while now. So, over our holiday break I finally sat down and created this 12x12" piece that I could either scrapbook, put on a canvas, or frame it. I started with these two gorgeous stamps from Eat Cake Graphics. Go check out their whole collection.They are all beautifully detailed. I stamped the house on white cardstock first, as to center it, then stamped the lake shoreline stamp twice on each side of the house to create the scene. Sprinkled it in metallic gold embossing powder, and heat set, to make it warm and inviting.
I used glossy accents to create 3D glass windows. Click the smaller pictures above for more detailed instructions. Once dry, I colored the windows with Copic markers to create warmth. Added some icicle glitter glue and shaved ice to really make it snowy all over. Tore the bottom edge, border punched the top with more snowflakes, adhered to blue snowflake paper, and then adhered the whole piece to this lighter 12x12 snowflake paper. Cut out a matching tag and adhere with a border at the bottom of the page. All the papers are from the same kit, which is great, because they all coordinate, and have coordinating stickers and tags too. I love kits! I added stickers for the title, the large white snowflake border, and wintery words on the bottom. Adhered a few navy metal shimmery snowflakes. And scattered some adhesive rhinestones all over to make it sparkle some more. I hope I've inspired you to use your craft supplies in a different way. Enjoy the snow...we will! ~Kim Supplies: Eat Cake Graphics Stamps: 6040-Q, 52 Winters Lane (house) and 7068-P, Lake shoreline; Echo Park Wintertime paper kit & stickers; Fiskars Snowflake border punch or edger; Ranger Stickles icicle glitter glue and green xmas stickles on wreath; Shaved ice; Copic markers; Glossy accents; Glue painters tape; Creative Impressions blue metal snowflakes; Adhesive rhinestones; Versamark clear watermark ink; Ranger super fine detail metallic gold embossing powder; and a Heat gun. Challenges: The Paper Girls Challenge #95 - Home/Family WIW Color Challenge ~ Navy, Light Blue and White Thank you for all your kind words and support these past years I've been blogging and creating online. I truly appreciate it! I always make my own cards and send it homemade from the heart. A phone call or an email is fine, but my mother and grandmother always hand wrote thank you cards and I've always carried that tradition onto my kids. So, I have them each write a few sentences to thank everybody for their presents. Do you make your own thank you cards after the Holidays or do you get a box from the store? Whichever way, it's important to say "thank you."
Santa Claus is coming to town! I found some time to fit in a few more cards to share with you all. I came across this pattern paper that had a lot of my favorite holiday prints in rows all on one sheet. And thought this is perfect for a holiday card. The sheet music reminds me of all the holiday songs we sing this time of year. The argyle print reminds me of holiday sweaters, and the candy cane stripes. And this detailed Santa and his eight reindeer is a wonderfully detailed stamp from Eat Cake Graphics. Go check out their whimsically detailed stamps. They are just precious...
Peace on Earth is my wish for all mankind! I'm done with my holiday cards and all are in the mail. So, I can share with you my final Christmas card. I scanned my original that was published earlier this year and complete materials list and step by step instructions are available here in CardMaker Magazine. The scan came out more periwinkle than baby blue, but it goes pretty good with the snowflake border I chose. See the picture below and you'll see what I mean. I uploaded my scan to Vistaprint and saved a bunch of time and money. And they included envelopes and address labels too. They are awesome at printing, discounts, and customer service. I use them all the time. I added a glittery silver poinsettia and a blue rhinestone to the center for some dimension. And tied a silver cord ribbon to make it complete. I think it turned out pretty nice. The inside card pictured below was already gray with snowflakes and added the text I wanted. I always have each family member sign every card for our special touch. Merry Christmas & Happy New Year! ~Kim & family Challenges: The Paper Girls: Challenge #93-Christmas (I'm a Winner Entry #56) 52 {Christmas} Card Throwdown: Dec- Pick a Previous 2015 Challenge I chose Combo #35 - January 2015-Colour Challenge-Shades of blue
Happy Holidays, everybody! As my personal "thank you" to all of you for your kind words and support, I've decided to have a giveaway each week in December. Yep, that is one prize per week, 4 prizes in all for December, and 4 chances to win!!!
So, lets get started on week #2... Week #2 prize is an Echo Park 6x6 paper pad from the "Winter Park" collection and 3 rolls of American Crafts holiday ribbon. I LOVE these and you will too and of course I'll toss in some surprise goodies too! Just enter the boxes below. Good luck and Happy Holidays! ~Kim View From In Here-#WAYWOW28! Skip to my Lou-Made by you Monday WINNER #1 Thank you for all your kind words and support of my crafty adventures! I love reading your comments and hearing about your projects. Thanks for sharing with me. I really do find it more rewarding to give than receive. So, without further adieu our first Holiday winner is... Comment #16: Ann Marie Miller
Happy Holidays, everybody! As my personal "thank you" to all of you for your kind words and support, I've decided to have a giveaway each week in December. Yep, that is one prize per week, 4 prizes in all for December, and 4 chances to win!!! To enter: "comment" on this post below, anything crafty or festive and "like" My Kraft Kloset Facebook page or Twitter or "follow" My Kraft Kloset on Pinterest Feel free to click and join my "networkedblogs" on the right sidebar of this page and link all your favorite blogs, all kinds, in one daily email, and never miss a post. I love it! (If you like or follow one or all of these pages, then I can easily contact you if you win. If you already follow, thank you, and just comment below.) Week #1 prize is a new Tim Holtz mini Distress Ink 4-Pack. I LOVE these and you will too and of course I'll toss in some surprise goodies too! Good luck and Happy Holidays! ~Kim Happy Holidays everybody! Do you love pattern paper as much as I do?
I don’t know…I collect A LOT of it. So, now it’s time to use some of it. I mixed and matched teal green wood grain, red bandanna, a quilt print, and a candy cane print. WOW! I told you we were using A LOT of pattern paper, but I think they represent this holiday card pretty well. Don’t you? So get your prints out and see what you can come up with and post them to My Kraft Kloset Facebook page. I’d love to see them. I created this card for the Eat Cake Graphics design team. Using the card above as a guide, start with a kraft colored card base, and adhere the three different pattern papers down. Do you make holiday cards? Do you need ideas? Or want to learn new techniques? This magazine is packed full of all kinds of projects for the holidays and the winter season. Even yours truly has a card published on pages 64-65. Go check it out! I'm very proud of it. So, I picked up a few extra copies of this winter issue of CardMaker Magazine and feel like sharing 1-2 with you. So, lets have a GIVEAWAY!
All you have to do: "like" my page on Facebook or "follow" my page on Twitter "follow" my page on Pinterest and if you already follow my crafty adventures, then please share my pages with your crafty friends and family. And comment below and tell me if you make holiday cards and how many do you make? I'll draw 1 name on Black Friday and 2 names if we get to over 100 comments. Thank you for all your support. ~Happy Holidays! You all wanted to see my card...so here it is...may there be peace on earth!
Project / Nominated: Merry Christmas Gift Card Album made by (me) Kim Klinkovsky was picked out of over thousands of nominees as a Top 10 Finalist in the Paper Crafts / Scrapbooking category with this adorable gift card holder album, made all from toilet rolls! Click the picture above for craft tutorial and complete instructions.
Tune in to TheCraftys.com to see the winners announced live via streaming video on Friday, Nov. 6, 2015 at 7 p.m. ET / 4 p.m. PT. / 5 p.m. MT Or if you can't watch it live tonight, you can catch it afterwards on Youtube here: https://www.youtube.com/watch?v=FkHLNYzkOSE Congratulations to all finalist in The Craftys! Yippee!!!! Once again I'm excited to share that I'm published with this gorgeous holiday card. I know it's Fall around here, but aren't you thinking about Christmas or holiday cards yet? As a card maker it's never too early, because we have to plan time to design, create, and assemble all the parts that go into a handmade card. I think about it all year long. I gather products, pin ideas, go to shows, shop, and organize supplies until about August or September. And everything is kept together in a tote bag until I"m ready to start stamping and cutting. Then I take a day and play. I get out all the stuff from the tote bag and figure out what I want to use and how I want my card to look like. I don't know about you, but I can't just whip this up in a day. It's quite a process. But I think this one just might be my 2015 Christmas card. What do you think? I can scan it, print it, and maybe add a ribbon and it's done! For a complete materials list and step by step instructions to make this card, you can subscribe to the Winter 2015 issue of CardMaker Magazine or check your local specialty craft stores. It's totally worth it!!! Sign up now and get instant digital copies and a paper copy mailed to you every quarter too. If you are already a subscriber you can login "here" and see the whole beautiful magazine right now. Download it to your pc or mobile device and have it forever. Enjoy 100 pages of wonderful Winter ideas, Veterans Day cards, and many Holiday projects and ideas at your finger tips. It's my favorite magazine and I hope it will be yours too! Feel free to post your cards to my Facebook page, because I want to see what your making too! Happy Fall and Winter Y'all. ~Kim Challenges: Emboss Folder Love! Little Red Wagon Challenge #309 The House That Stamps Built: WIW September Anything Goes Challenge This adorable snowman card was awarded "Honourable Mention" at the 52 Christmsmas Card Throwdown Challenge. Where it's Christmas all year long. Click the 52 picture above to check out all the winners. And click the snowman card below to see more amazing cards and some really great ideas for your upcoming holiday cards. Join every week for a fun new Christmas or Winter related challenge, stretch your imagination, and use those supplies. Thanks so much 52 Christmas Card Throwdown!
Christmas in July is the theme this month. Are you thinking about Christmas cards yet? I'm at the thinking stage still. I search Pinterest for ideas and several craft groups on Facebook. Then I'll start about Sept/Oct. Are you working on those holiday or vacation albums while you have some extra time this summer? I made a mini album to document one our favorite memories of carols, dinner, and hot coco on the "Santa Train" at Christmas time through our beautiful mountains. It was just precious to see them write out wish lists and see their faces when Santa arrived and visited with each child and picked up all their lists.
For more info on the Santa Train click "here." I found this album by Making Memories and it was a recipe book album. So, I bought two. One for our favorite family holiday recipes and the other to make this adorable album. I used a combination of Doodlebug Christmas and BoBunny North Pole and Blitzen Collections of pattern paper and die cuts. The colors and patterns worked really well together. Added just a few gems and train stickers throughout to remind you, we were on a train. With a touch of journaling to tell each pages story. I just love how it turned out. I entered this in: CraftySteals Third Thursday CHRISTMAS IN JULY Challenge! It's heating up here in Colorado and what better way to cool us down than to think of Christmas in July. I always make thank you cards after the holidays and I made this adorable card for the 52 {Christmas} Card Throwdown and just love this little snowman easily made with just punches. I started with a snowflake embossed background, added a snowflake brad, and adhered to card base. I tore white cardstock, inked it up, and added some stickles glitter glue for some sparkle, adhered to card and stamped sentiment. Punch out three circles (2", 1.5", and 1") for the body, a 1 1/4"
square punch for the hat, and a snowflake punch for the arms and popped up the body for dimension. Added some ink and stickles, an adorable face, and a colorful scarf. Hope your staying cool, drink lots of water, and please keep your dogs and kids safe this summer. I entered this card in: 52 {Christmas} Card Throwdown: Theme Challenge (52CCT29-15) CraftySteals Third Thursday CHRISTMAS IN JULY Challenge! The Crafter's Cafe Challenge: # 126 - Christmas in July - 22 July, 2015 Do you sometimes need cards fast? Do you make thank you cards? Come see how I took one 12x12 sheet of pattern paper and turned it into six "thank you" cards. I learned from my Mom and my Grandmother at a young age that it's important to take the time to thank people with a written note. I still do that, usually with a handmade card. I have since passed that etiquette down to my four kids and hope they carry it onto their children. Yes, sometimes they moan and groan (as 3 of them are boys), but I hope they are learning why gratitude is important. Once you have all your card fronts attached you can add little touches. I added some sparkle on the center trees with a glitter pen. Added some flower embellishments to keep it kind of flat for mailing. Stamp sentiment on the outside and inside. In one hour or less you can have six cards made in no time. I had to make more than six cards so I used a few sheets from the matching MME 6x6 paper pad too. If you pick really detailed pattern paper, this makes it look like it took you a week to stamp it all. I always look for a deal on my craft products and usually save 50% or more on whole collections, so everything matches. See below where you too can get daily deals posted to Facebook, Pinterest, or Twitter. Have fun! ~Kim Supplies:
My Minds Eye 12x12 Vintage Christmas pattern paper Recollections Ivory A2 cards/envelopes (at Michaels) Stampin Up Wheel and stamps Ranger Tim Holtz Distress Ink Peeled Paint American Crafts Glitter Ribbon Copic Spica Atyou clear glitter pen Prima Flowers (I won in a giveaway from Prima and G45) 1/4" Red double sided sticky tape Daily Craft Deals: A modern Christmas card with a tale to tell...once upon a time, I had a stamp I wanted to use. It was of the Eiffel tower wrapped in holly. When I think of the Eiffel tower, I think of pink and black and a card was born. I have never created a modern card before and certainly not a pink Christmas card, as I knew my husband would be thrilled. NOT! LOL...but once it was finished, he did like it.
I knew I wanted pink and black. I started back in August gathering up products I had, or found around town, and putting them in a tote bag. Every time I had an idea or a product I wanted to use, it went in the tote bag. I do this every year. So, when I'm ready to create I have all my ideas and products in one tote bag. Makes life a little easier...See tutorial below... Would you believe this handmade gift card holder album is made from toilet rolls? Well...it is! As you see, I made five holders attached with a D ring and tied on some coordinating ribbon. I can't take credit for this idea, so I want to thank my friend Cynthia for first introducing me to this project. I love it and use it all the time throughout the year. You can find lots of toilet roll projects on Pinterest and Bo Bunny just posted a toilet roll project today too. See how I made this gift card holder album below...
Hello, December!
I'm a bit panicked, as I"m usually done with my Christmas cards by now. But I have a plan...as I"m "procraftinating" today and making my cards now, while ignoring everything else. But I won't forget picking up my kids from school, but my tummy is rumbling, so it must be lunch time. Boy am I easily distracted today! I"m back. Had to have some lunch to feed my brain. A couple tips: eat, plan out your card, breathe, you still have time to mail out your cards. I've got my card almost planned out, then I can start adhering it together, adding embellishments, and some bows! I like to cut out a few layers and piece them together to see how it's going to look first, before I adhere. That way if I don't like it, I can still change it. This year I'm going very modern and that's all I'm going to say. I can't wait to show you! What are you making today? What ever it maybe, I hope it makes you happy. From our house to yours...Happy Holidays! October is my favorite month, always has been, with the leaves changing colors, pumpkin flavors, Halloween, and the crisp air. It just makes me happy! My house faces west looking straight at the Rocky Mountains and when I'm outside I can feel and smell the air changing. It gets fresh, cold, and crisp, like just fallen snow. Winter will soon be upon us. My sister and I have birthdays this month and my twin niece and nephew, who will be one years old, share birthdays with us this month too. So, it's a busy month for card making at my house.
It also inspires me to get organized and get prepared for the holiday card season. The last few years I've made 75-100 cards for my friends and family. I need lots of space when I start making Christmas cards. I usually start in September or October gathering ideas, stamps, ribbon, die cuts, paper, embellishments and products I'm thinking of using on my holiday cards. I keep them all together in a tote bag. When I'm ready to play around with colors, patterns, and a layout, I have it all in one bag. Once I've decided on a layout and design, I create an assembly line, and do all my paper cutting, stamping, embossing, die cutting, and then put each card together. It makes holiday card making so much easier. What are you making this month? Whatever it is, take time, go outside, see the leaves changing colors, play in the leaves, take pictures of the beauty around you and enjoy Fall. Are you celebrating World Card Making Day this weekend? Click here for more info: http://www.worldcardmakingday.com/index.html The March of Dimes has been helping kids for over 75yrs. Every day, thousands of babies are born too soon, too small, and often very sick. Three generations of my family have been affected. My twins were born 3 weeks early and are happy and healthy 11yr olds, because of good prenatal care and education. My sisters twins were born 7 weeks early, spent one month in the NICU, and are happy healthy 6mo olds today, because of the NICU care they received provided by the March of Dimes. And our mother was affected by Polio at 9yrs old. Thanks to the March of Dimes research they created the polio vaccine. Our family, including grandparents, and six healthy grandchildren will walk together on April 26, 2014 for the health all babies, because we want to find a cure and we need your help. We only have a few short weeks until our event, please support our mission and make a secure online donation or join our team. Click here for more info: March for Babies Thank you for helping give all babies a healthy start! |
Hi! Welcome to
My Kraft Kloset I'm Kim Klinkovsky, a Published Card Maker, Blogger, Scrapbooker, Jewelry Maker, Wife to an US Army Veteran, Mom to 4 kids (including twins) and this is my crafty place. It's interrupted by life, fueled by coffee & sweet tea or a cocktail--Ha! And where I share all my crafty adventures. *** Follow Social Media Channels above to see more! ©2013-©2024 *** ***
I, Kim Klinkovsky am the legal copyright holder ©2013 - ©2023 of all the material (pictures, text, & artwork) on this website and blog. It may not be used, reprinted, copied, submitted, sold, or published without my written consent. *** I'm on a couple Design Teams and in a few affiliate programs that have given me products to try or use, but my opinions are my own and I use what I like. Affiliate links are listed below and listed in the supply lists of my projects. They allow me to receive a small commission if you click on those links or purchase any products, at no extra cost to you. It helps me contribute to my family & keeps this blog going. Thank you for your support! Affiliate Links:
Design Teams: Publications Awards: Categories
All
Archives
April 2024
Past
Design Teams: FTC Declaration:
**As a designer I occasionally receive product(s) to use in some of my posts. Some posts may contain Affiliate links at no cost to you.** Stamps and other products shown on this website/blog may have been donated for promotional purposes by the company(ies) named in the post. All opinions are my own and Affiliate links and programs help to support my family and keep this site going. Disclosure Statement for Affiliate Links Policy is valid from: 31 December 2013 To get your own policy, go to: www.disclosurepolicy.org |