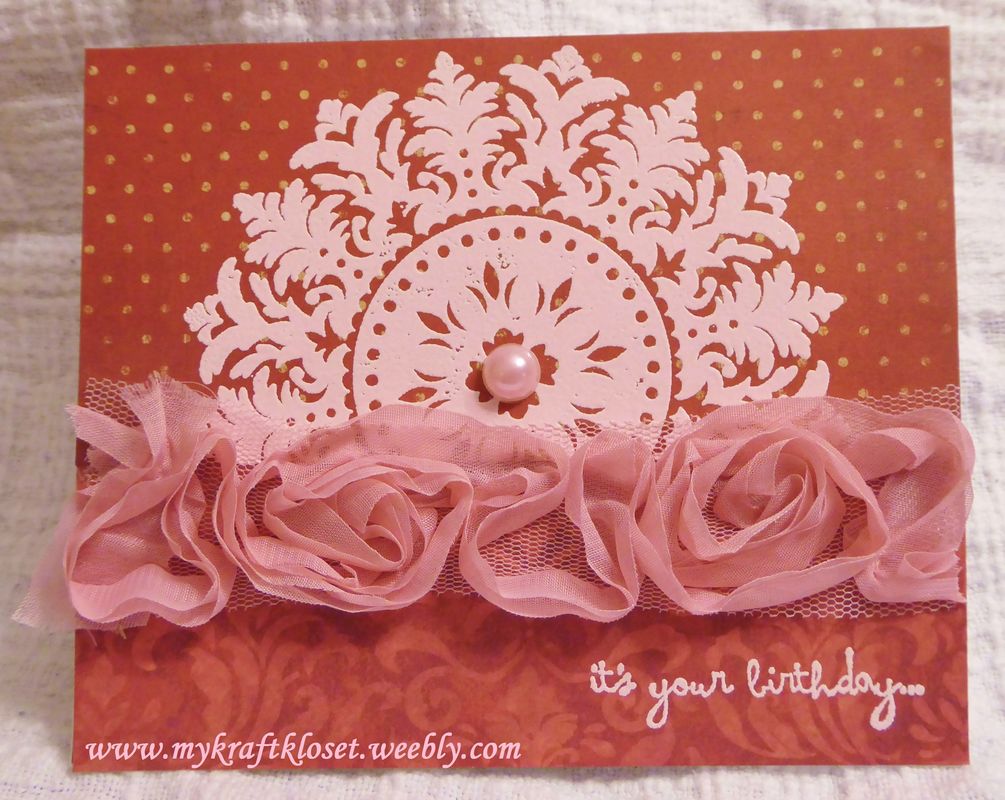
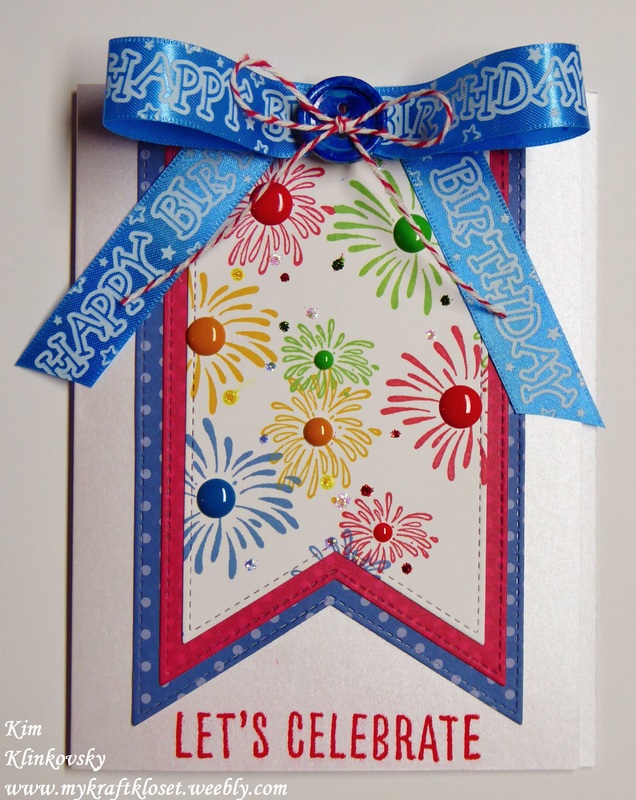
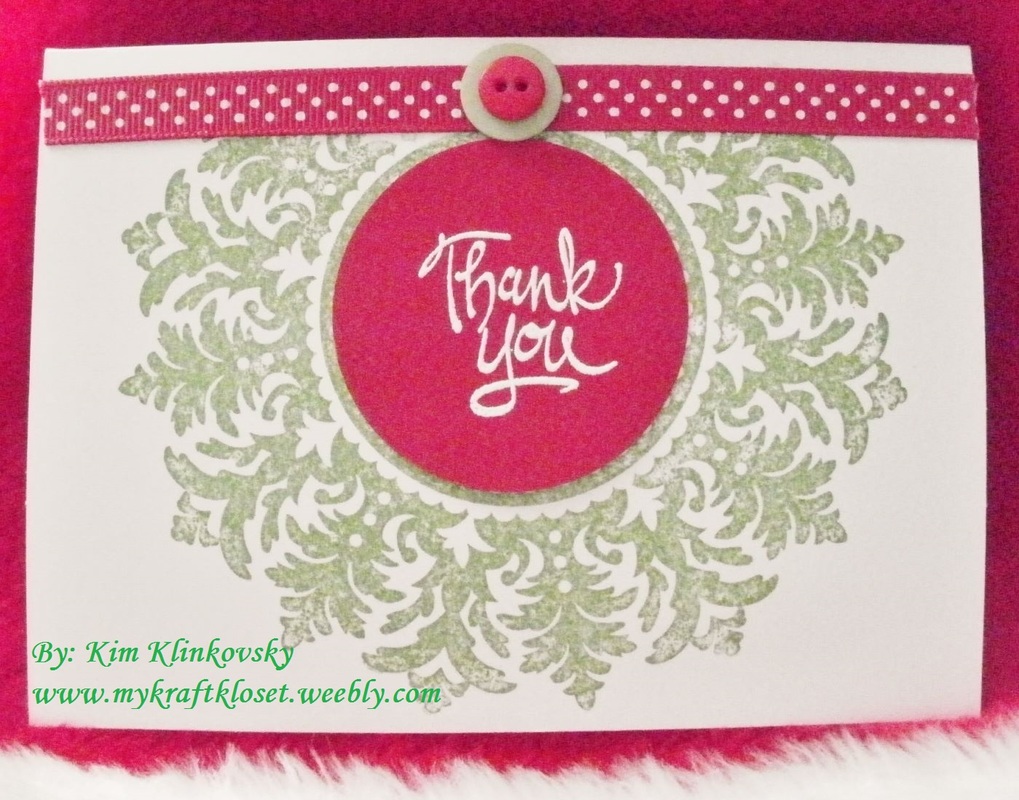
Happy February! Today I'm sharing with you a birthday card I made for someone special celebrating this month. And I love to use pinks and reds in honor of Valentines too! And combined with red patterned paper, this gorgeous medallion, and a romantic ribbon, this card screams lovey dovey. Click to "read more"...
4 Comments
Merry Christmas from our house to yours! ~Kim and family
<<Step by Step Tutorial "here" >> Challenges: The Paper Girls Challenge #118 - ANYTHING GOES!! Simon Says Wed. Challenge: Make It Sparkle CFC163 -- Christmas & Hanukkah Supplies Used: Eat Cake Graphics Stamps: 8094-R, Santa’s sleigh and 8214-I, Santa stops here sign (text); Echo Park paper & stickers-Merry Christmas 2010 Collection; Versamark clear watermark ink; Ranger super fine detail metallic gold embossing powder; Heat gun; Copic markers (red, green, brown, skin); Ranger Silver, Green, and Xmas Red Stickles glitter glue; Atyou Spica gold glitter pen; American Crafts red glitter ribbon; Tree stickers from Michaels; and professionally printed at Vistaprint. Hi everybody! I'm sharing a very classy, elegant and special card I made for my daughters medical training graduation that has a personal touch. We're so proud of her achievements! And whether it’s a graduation, wedding, anniversary, birthday, or a baby shower, you too can add a personal touch to any card easily with these awesome tools. Check out the Epiphany Crafts Tools for step by step instructions and a complete supply list! Click the "Read More" for tutorial and supplies...
Hi everybody! I’m up on the CardMaker Blog today sharing my last post for the Blog Team and Celebrating my 20th Wedding Anniversary today too! I wanted to go out with a bang and this one is jam packed with lots of pictures, tips, party, and décor ideas to spruce up your celebrations. So, be sure to hop over there and see how I combine card making supplies with upcycled party favors to create a bash to remember. See all the re-purposed decorations up on the CardMaker blog "here."
Happy 20th Anniversary to my hubby! I Love You ~Kim Happy Birthday, America! Let's Celebrate our Independence! Well, almost. But first, I thank you for joining me and the super talented designers from the CardMaker Blog Team and the Clearsnap Team, as we Blog Hop together today sharing our one of a kind projects using amazing Colorbox Chalk inks. (see tutorial and a supply list below) Challenges: DoubleClick - AKA Abusybee-Challenge: For a Man or Boy! Little Tangles Challenge #69- Embossing Split Coast Stampers Challenge: CAS383-Good Ole Red, White, & Blue CAS-ual Fridays: CFC151 -- Color Challenge Welcome to the 3rd Annual "Blogs 4 Boobies" Blog Hop with over 60 designers and sponsored by Skipping Stones Design (SSD). It's a 7-Day Event that I am honored to be a part of this great cause that is near and dear to my family, as we celebrate my little sister being “cancer free.” But not everybody is as lucky. We honor those we've lost; encourage those in treatment, fighting the fight; and we cherish those deeply who have survived. We salute all of you for your bravery and courage! We all know somebody...AND YOU CAN HELP US STAMP OUT CANCER!
Happy Thursday everybody! Hop along with me and the talented designers from the Cardmaker Blog Team and Ranger Industries. As we each share lots of wonderfully creative projects using the *NEW* Tim Holtz Distress Crayons. I can't wait to see what everybody created...
Hi everybody! I'm sharing heat embossing tips and techniques up on the CardMaker Blog where I created a sample board to show you how to keep it all straight. Because with so many different inks and embossing powders it can be overwhelming. So hopefully I cleared up some of the confusion. Easter is Sunday, March 27th and I wanted to get a jump on making some cards. On this Easter card I used two different heat embossed techniques. Can you tell which ones? See a sample board I created that breaks it down for you up on the CardMaker Blog. And get a complete supply list to make this Easter card. Thanks for stopping by today! Challenges: The Paper Girls Challenge-#98 - Show me Some Sunshine: I created a sun from die cut embellishments and used banners as rays. Easter 4CC #288 Skip to my Lou-Made by you Mondays Happy Leap Year! And what better way to celebrate February 29th than a Blog Hop with my talented team of designers at CardMaker and
Faber-Castell. Make sure you hop to each Blog, check out each amazing project, and write a quick comment (we love comments). See complete Hop list, tutorial, and supplies below... It's winter time and once again our whole town is blanketed in fresh new snow. And my three sons are hoping for a snow day, so we can sleep in and then go sledding! I won't lie, I am too! lol. Anyhoo...before I go sledding, let me share my newest project. I've been wanting to create a home decor piece for a while now. So, over our holiday break I finally sat down and created this 12x12" piece that I could either scrapbook, put on a canvas, or frame it. I started with these two gorgeous stamps from Eat Cake Graphics. Go check out their whole collection.They are all beautifully detailed. I stamped the house on white cardstock first, as to center it, then stamped the lake shoreline stamp twice on each side of the house to create the scene. Sprinkled it in metallic gold embossing powder, and heat set, to make it warm and inviting.
I used glossy accents to create 3D glass windows. Click the smaller pictures above for more detailed instructions. Once dry, I colored the windows with Copic markers to create warmth. Added some icicle glitter glue and shaved ice to really make it snowy all over. Tore the bottom edge, border punched the top with more snowflakes, adhered to blue snowflake paper, and then adhered the whole piece to this lighter 12x12 snowflake paper. Cut out a matching tag and adhere with a border at the bottom of the page. All the papers are from the same kit, which is great, because they all coordinate, and have coordinating stickers and tags too. I love kits! I added stickers for the title, the large white snowflake border, and wintery words on the bottom. Adhered a few navy metal shimmery snowflakes. And scattered some adhesive rhinestones all over to make it sparkle some more. I hope I've inspired you to use your craft supplies in a different way. Enjoy the snow...we will! ~Kim Supplies: Eat Cake Graphics Stamps: 6040-Q, 52 Winters Lane (house) and 7068-P, Lake shoreline; Echo Park Wintertime paper kit & stickers; Fiskars Snowflake border punch or edger; Ranger Stickles icicle glitter glue and green xmas stickles on wreath; Shaved ice; Copic markers; Glossy accents; Glue painters tape; Creative Impressions blue metal snowflakes; Adhesive rhinestones; Versamark clear watermark ink; Ranger super fine detail metallic gold embossing powder; and a Heat gun. Challenges: The Paper Girls Challenge #95 - Home/Family WIW Color Challenge ~ Navy, Light Blue and White Thank you for all your kind words and support these past years I've been blogging and creating online. I truly appreciate it! I always make my own cards and send it homemade from the heart. A phone call or an email is fine, but my mother and grandmother always hand wrote thank you cards and I've always carried that tradition onto my kids. So, I have them each write a few sentences to thank everybody for their presents. Do you make your own thank you cards after the Holidays or do you get a box from the store? Whichever way, it's important to say "thank you."
Happy New Year! I just love this robot stamp from Eat Cake Graphics for so many occasions. Go check them out, they have great stamps that are very versatile for any occasion. I stamped the robots on cardstock, heat embossed in black, and colored with Copic markers.
Santa Claus is coming to town! I found some time to fit in a few more cards to share with you all. I came across this pattern paper that had a lot of my favorite holiday prints in rows all on one sheet. And thought this is perfect for a holiday card. The sheet music reminds me of all the holiday songs we sing this time of year. The argyle print reminds me of holiday sweaters, and the candy cane stripes. And this detailed Santa and his eight reindeer is a wonderfully detailed stamp from Eat Cake Graphics. Go check out their whimsically detailed stamps. They are just precious...
Happy Holidays everybody! Do you love pattern paper as much as I do?
I don’t know…I collect A LOT of it. So, now it’s time to use some of it. I mixed and matched teal green wood grain, red bandanna, a quilt print, and a candy cane print. WOW! I told you we were using A LOT of pattern paper, but I think they represent this holiday card pretty well. Don’t you? So get your prints out and see what you can come up with and post them to My Kraft Kloset Facebook page. I’d love to see them. I created this card for the Eat Cake Graphics design team. Using the card above as a guide, start with a kraft colored card base, and adhere the three different pattern papers down. Hello Fall and Happy Thanksgiving. If you make cards or not for the holidays, you still have time to mail them or pass them out at the family feast. I encourage you to embrace the gorgeous fall stamps that are out on the market everywhere right now. The aspen leaf is synonymous with Colorado and I had to use it. This gorgeous stamp is from a locally owned stamp store Holly Berry House Originals and I just love them. The sweetest most generous people you'll ever meet and the most precious store full of nick knacks, needlepoint, yarn, gifts galore, and oh yeah--the most gorgeous stamps I've ever seen...
Happy Halloween! What are you doing tonight? Are you going out or staying in? My kids are dressing up and I'm taking them out trick or treating. I'll probably put on my witches hat and tag along. Then we'll watch some semi-scary movies, eat popcorn, and probably some candy too.
In honor of my mother-in-law I thought I'd share her birthday card with you. Yes, her birthday is today, on Halloween. Isn't that cool? I just love making her a card every year, because she loves everything Halloween. And I do too! So, I can really be creative and have fun with her cards... Happy Fall Y’all! I LOVE-LOVE-LOVE this time of year when all the leaves change colors and the elk and moose come out in abundance. I made this wonderful card for my design team Eat Cake Graphics. This incredible stamp is one whole piece and reminds me of my gorgeous Rocky Mountains with it's shimmery snow capped mountains, green pine trees, and the moose...
Happy Birthday, Dad! As promised, lots of Fall birthday cards coming your way! Not that you can tell from this picture, but I started with a kraft colored card base. I painted a strip of the top and bottom of the card and a button with a gold paint pen. To make it shimmer like Fall.
On a piece of white cardstock I stamped one of my favorite SU (retired) leaf stamps, from the Fall Whimsy set. Sorry, gotta use what you have. But you can still find this set online. I combined the leaf stamp with a script stamp from Penny Black, and a sentiment stamp, to create this unique stamped image layered upon a one of a kind watercolor background. See complete instructions for this stamping, masking, and watercolor techniques in the Autumn 2015 issue of CardMaker Magazine. Supplies: Kraft and white cardstock; Carta Bella Autumn 6x6 pattern paper pad; Krylon gold paint pen; Stampin up stamps-Fall Whimsy (retired); Doodlebug button; twine; Versamark clear ink; Orange embossing powder (Ranger or Zing); Tim Holtz mini dye ink pads: rusty hinge, dried marigold, scattered straw; and glue dots. Shared this card on: Skip to my Lou-Made by you Mondays Yippee!!!! Once again I'm excited to share that I'm published with this gorgeous holiday card. I know it's Fall around here, but aren't you thinking about Christmas or holiday cards yet? As a card maker it's never too early, because we have to plan time to design, create, and assemble all the parts that go into a handmade card. I think about it all year long. I gather products, pin ideas, go to shows, shop, and organize supplies until about August or September. And everything is kept together in a tote bag until I"m ready to start stamping and cutting. Then I take a day and play. I get out all the stuff from the tote bag and figure out what I want to use and how I want my card to look like. I don't know about you, but I can't just whip this up in a day. It's quite a process. But I think this one just might be my 2015 Christmas card. What do you think? I can scan it, print it, and maybe add a ribbon and it's done! For a complete materials list and step by step instructions to make this card, you can subscribe to the Winter 2015 issue of CardMaker Magazine or check your local specialty craft stores. It's totally worth it!!! Sign up now and get instant digital copies and a paper copy mailed to you every quarter too. If you are already a subscriber you can login "here" and see the whole beautiful magazine right now. Download it to your pc or mobile device and have it forever. Enjoy 100 pages of wonderful Winter ideas, Veterans Day cards, and many Holiday projects and ideas at your finger tips. It's my favorite magazine and I hope it will be yours too! Feel free to post your cards to my Facebook page, because I want to see what your making too! Happy Fall and Winter Y'all. ~Kim Challenges: Emboss Folder Love! Little Red Wagon Challenge #309 The House That Stamps Built: WIW September Anything Goes Challenge I'm so excited to share my second card published in the Autumn 2015 issue of CardMaker Magazine, but you'll have to subscribe to get a materials list and all the instructions to make this yourself. Sorry! But it's totally worth it!!! And pictures don't do this card justice. It's three stamps set in a super shiny gold metallic embossing powder that reminds me of the golden colors of Fall.
The digital copy of the magazine is available now and if you are a subscriber you can login "here" and see the whole beautiful magazine now. Sign up now for a subscription and get a paper copy of gorgeous Fall and Halloween projects. It's approx. $6 US per issue, sold at specialty stores or online and is published quarterly. It is one of the few still publishing paper copies. Once you have a subscription, you have access to 2 years of back digital issues and you can download them to have forever. It's my favorite magazine and I hope it will be yours too! I entered this card in a challenge: The House That Stamps Built: WIW September Anything Goes Challenge 4 Crafty Chicks -4 CC Challenge #265 {Sparkle & Shine} Crafty Cardmakers and more -#148 Make It Sparkle Happy Fall Y'All! - Little Red Wagon Challenge #308 Skip to my Lou - Made by you Monday I am so excited and honored to be the guest designer this month for The Paper Girls Challenge #87 Sept 7 - Grateful / Thankful What are you grateful or thankful for? I am grateful for Fall, family, and fun together. It’s my most favorite time of the year when the leaves change colors, there’s a chill in the air, pumpkin flavors everywhere, and we have eight birthdays between September and November. It's crazy, but fun. So, I was inspired to make this card really shimmer with the golden color of the season and love that this stamp by Stampendous lists all the fun things we like to do in the Fall. I used Versamark clear ink to stamp the text background and sprinkled with Ranger super fine gold metallic embossing powder. Then added gold tinsel ribbon for some texture and more shimmer. And used a Krylon paint pen to change the clear adhesive gems to gold. Supplies: Stampendous autumn text stamp Versamark clear ink Ranger super fine gold metallic embossing powder Large Corner Rounder punch Scallop circle punch Tim Holtz rosette die cut Gold tinsel ribbon Clear adhesive gems Krylon gold paint pen Now show us your projects, anything that means "grateful or thankful" to you! Click the pic below for more details on how to enter by Sat, Sept. 19th. I entered this card in a challenge:
Happy Fall Y'All! - Little Red Wagon Challenge #308 4 Crafty Chicks Challenge #264 - Circles I'm so excited to finally share my published creations with you all. This is one of four cards selected by CardMaker magazine that I will be sharing with you over the next few weeks. I'm honored that CardMaker Magazine has selected this Autumn card to share with their social media. Didn't they make it look pretty? Find complete materials and instructions for making this project in the Autumn issue on newsstands now! ● Go here to order your digital copy of the issue now: http://bit.ly/1f55J3R. Now lets have a GIVEAWAY to celebrate my dream come true of getting published. I'm excited to give away this copy of the Autumn 2015 issue of CardMaker Magazine. It has details about all four of my favorite creations and so many more fabulous projects for you to enjoy. To win, leave me a comment below telling me your favorite pattern paper. Then follow me here at "My Kraft Kloset" Pinterest page, pin this stunning card and share it with everyone you know. I will announce a winner next Saturday, September 12th. Good Luck! I entered this card in these challenges: Happy Fall Y'All! - Little Red Wagon Challenge #3084 Crafty Chicks #262 Fall/GDT Call and WON!!! Autumn is in the air today with a cool breeze coming off the mountains. I just love it. Looking in my paper stash I came across this gorgeous paper from BoBunny-Forever Fall and I really wanted it to shine. In my opinion, they do make the most beautiful fall pattern paper collections I've ever seen. This paper didn't need much and I wanted to keep it simple, as to not cover up the paper or the stamping.
I roughed up the edges for a distressed look and adhered to card base. And used this amazing retired stamp from Memory Box that added just enough details. Using what I've got, right? Inked it up with Versamark clear ink and heat embossed it with Ranger super fine gold powder. As well as the sentiment. Then punched out the "thanks" with a tag punch, hole punched, tied some twine around it and added some pop dots for dimension. Just a few supplies and I have this gorgeous card. Change the sentiment and it's great for many occasions. Happy (almost) Fall Ya'll. I entered this card in a challenge: Happy Fall Y'All! - Little Red Wagon Challenge #308 DCC99 ~ Falling for Fall – Autumn 4 Crafty Chicks #262 Fall/GDT Call I'm published...again!!! I'm sooooooooo excited to share the news with you that CardMaker Magazine selected four of my cards for their Autumn 2015 issue. The digital copy of the magazine is available now and if you are a subscriber you can login "here" and see the whole beautiful magazine now. The paper issue will be mailing mid July. Go see your copy now...100 pages of gorgeous Fall and Halloween ideas and projects to get started on.
I am pleased to announce I can finally share my cards with you, but you'll have to pick up a copy of CardMaker Magazine for a materials list and instructions. Sorry! But the magazine is totally worth it!!! It's only approx. $6 US per issue, sold at specialty stores or online. It is published quarterly, and is one of the few still publishing paper copies. So if you'd like the Autumn issue you have until end of September to get your copy. Because the Winter issue comes out in October. (which I have one card in that issue too). But once you have a subscription, you have access to 2 years of back digital issues and you can download them to have forever. So, lets have an Autumn GIVEAWAY...leave me a comment below about what you think of my new projects and what your favorite part of Autumn is and I'll announce a winner next Saturday, July 11th. Thanks for all your kind words and support! I made this for Archivers awhile back and it's just been waiting for me to show you and today is that day. I used precut cardstock, the beginners quilling set, and the Tim Holtz composer tissue wrap paper (which I just love) to create this unique circle card. Add some ribbon and make it a door hanger for some holiday decor or add a pocket for a gift card. Very versatile for an Anniversary, Birthday, Valentines, or just because.
See Archivers online for a complete supplies list and tutorial click "here" I entered this card in the "little red wagon" challenge and this weeks theme is "red and white." See my Gallery for more card ideas. |
Hi! Welcome to
My Kraft Kloset I'm Kim Klinkovsky, a Published Card Maker, Blogger, Scrapbooker, Jewelry Maker, Wife to an US Army Veteran, Mom to 4 kids (including twins) and this is my crafty place. It's interrupted by life, fueled by coffee & sweet tea or a cocktail--Ha! And where I share all my crafty adventures. *** Follow Social Media Channels above to see more! ©2013-©2024 *** ***
I, Kim Klinkovsky am the legal copyright holder ©2013 - ©2023 of all the material (pictures, text, & artwork) on this website and blog. It may not be used, reprinted, copied, submitted, sold, or published without my written consent. *** I'm on a couple Design Teams and in a few affiliate programs that have given me products to try or use, but my opinions are my own and I use what I like. Affiliate links are listed below and listed in the supply lists of my projects. They allow me to receive a small commission if you click on those links or purchase any products, at no extra cost to you. It helps me contribute to my family & keeps this blog going. Thank you for your support! Affiliate Links:
Design Teams: Publications Awards: Categories
All
Archives
April 2024
Past
Design Teams: FTC Declaration:
**As a designer I occasionally receive product(s) to use in some of my posts. Some posts may contain Affiliate links at no cost to you.** Stamps and other products shown on this website/blog may have been donated for promotional purposes by the company(ies) named in the post. All opinions are my own and Affiliate links and programs help to support my family and keep this site going. Disclosure Statement for Affiliate Links Policy is valid from: 31 December 2013 To get your own policy, go to: www.disclosurepolicy.org |